How To Use Ready Mix Paint For Quick Home Projects
Want to give your home a whole new appearance without all the hassle and stress of painting’s complex preparation?
Restoring that vintage dresser, adding a splash of playful color to your living room, or giving your backyard a makeover? Ready-mix paint is your best option for quick, dramatic transformations.
Relative to the old paint, which typically means a set of steps—mixing, thinning, and color matching—is already done, ready mix paint is pre-mixed and simply ready to emerge from the can. This convenience makes it perfect for homeowners, renters, and weekend warriors who’d like to accomplish a project on a Saturday morning with minimal hassle and maximum impact.
Ready mix paint is a cinch to apply, budget-friendly, and available in a finish to suit almost any surface. This article will guide you through how to choose, apply, and store ready-mix paint like a pro.
1. Choose the Right Object of Paint
The most important advice for any painting project is to choose the proper type of paint for the surface.
There is ready-mix paint in various formulas for different uses—some function better on wood, some on metal or masonry. They come in different finishes, from matte to high gloss.
Apply low-odor and washable water-based ready-mix paints for indoor ceilings and walls. For furniture or cabinetry, go for satin or semi-gloss, which is easy to clean with a wipe and will last. For work outside, apply outdoor-ready formulas that are moisture-, UV-, and temperature-swing-resistant.
With the correct type of ready-mix paint, results will last, and the finish will be smooth and even. Check the label to ensure it’s safe for your surface, and don’t be afraid to get suggestions from your supplier based on your project.
2. Prepare Your Surface
The best paint won’t stick well to a dirty or uneven surface. Good preparation is the key to a professional-looking finish.
Start by stripping off any old paint, grease, or dust from the surface. A little sanding helps the paint adhere better for smooth surfaces like laminated furniture. Fill in the cracks and holes using filler and let them dry completely. Then, sand them down and scrape off all the dust.
To save your lines, mask off areas like trim, hardware, or nearby walls using painter’s tape. If your chosen ready-mix paint does not come with a primer and your surface is porous or stained, use a separate primer coat.
This makes for some time investment but pays great dividends in maximizing the appearance and duration of the finished work that has been painted.
read more : 10 Camping Essentials You Should Consider
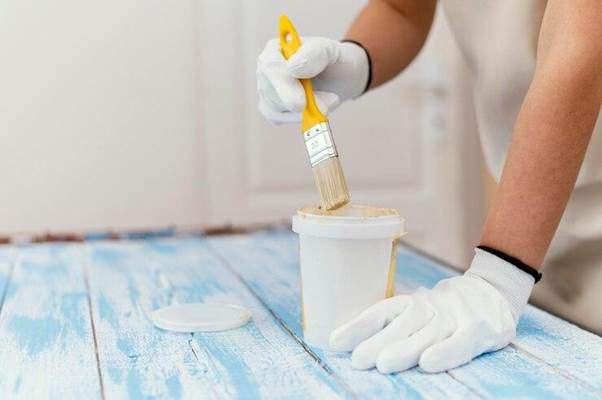
3. Stir Before Use
Though ready-mix paint is convenient, it must be stirred appropriately before being applied.
Paint will settle during storage, with pigment and binder at the bottom of the can. Stir thoroughly with a wooden stick or paint paddle, scraping the bottom so the color flows evenly.
For large projects, attempt to deposit some of the paint into a secondary bucket or rolling tray to save for rolling and prevent contamination of the brush. Mix minimally as you work, especially if painting in sections or changing between surfaces. This prevents your color from varying from coat to coat and ensures the proper texture and coverage.
4. Use the Right Tools
Choose the right paint tools; your work will be cleaner and simpler. A medium-nap roller with plenty of paint but not too many drips will work perfectly for plumb walls.
A thick-nap roller will fill grooves and cracks on textured ceilings or walls. Angled brushes are the tool for cutting edges near trims, windows, or ceilings. Foam brushes and small rollers are sufficient for low-work applications like furniture, doors, or cabinets. And don’t forget the basics, such as a paint tray, drop cloths, and gloves. Good tools save time and also enhance your end product.

5. Work in Thin Layers
Another beginner’s mistake is attempting to paint too much at once. Although thick coats appear quick and easy, they are likely to cause streaks, drips, or uneven drying.
Instead, apply your ready-mix paint in thin, even coats. Let each dry completely before applying for 2 to 4 hours, depending on paint type, surface, and room conditions. Two or three thin layers are usually preferable to one heavy coat. This approach provides a harder, smoother finish and helps avoid bubbles or cracking.
6. Ensure Good Ventilation
You should have decent ventilation when painting inside. Low-VOC paint also emits fumes that settle behind, especially in tiny or less ventilated rooms. Open windows and circulate fans to circulate air while and after painting.
Avoid painting if extreme temperatures or humidity cannot be avoided, as this will compromise the adhesion quality and drying of paint. Spring and autumn are generally optimal for painting indoors.
Wearing a mask when sanding or painting for an extended period is also advisable, particularly when using oil-based paint or painting in tight spaces.

7. Seal and Store Leftovers Properly
After you finish your project, proper storage will save you money on future touch-ups.
Wipe the area near the rim of the can clean with any paint to seal it airtight. Plug the opening with plastic wrap and pound solidly on the top to close the air. Store the paint in a cool, dry location—not in direct sunlight, near heaters, or freezing temperatures.
Label the can with the date, color code, surface painted, and coats applied. This will be helpful in case you ever need to color-match or touch up scuffs and chips. If you have a lot of leftover paint, do not discard it; give it to a local school, artists’ group, or charity—many will accept half-full cans for use in their artwork.
Final Thoughts
Working with ready-mix paint on home projects is perhaps the easiest and most affordable way to transform your area.
It makes the painting process a breeze—no dirty estimating, tinting, or measuring—so you can care less about creativity and performance and more about doing your thing. From picking the correct formula to creating even, smooth layers and storing leftovers correctly, this book contains all you need to help you win.
Whether you’re a seasoned DIYer or just trying your hand at a quick weekend update, ready mix paint is a wise, versatile choice.


